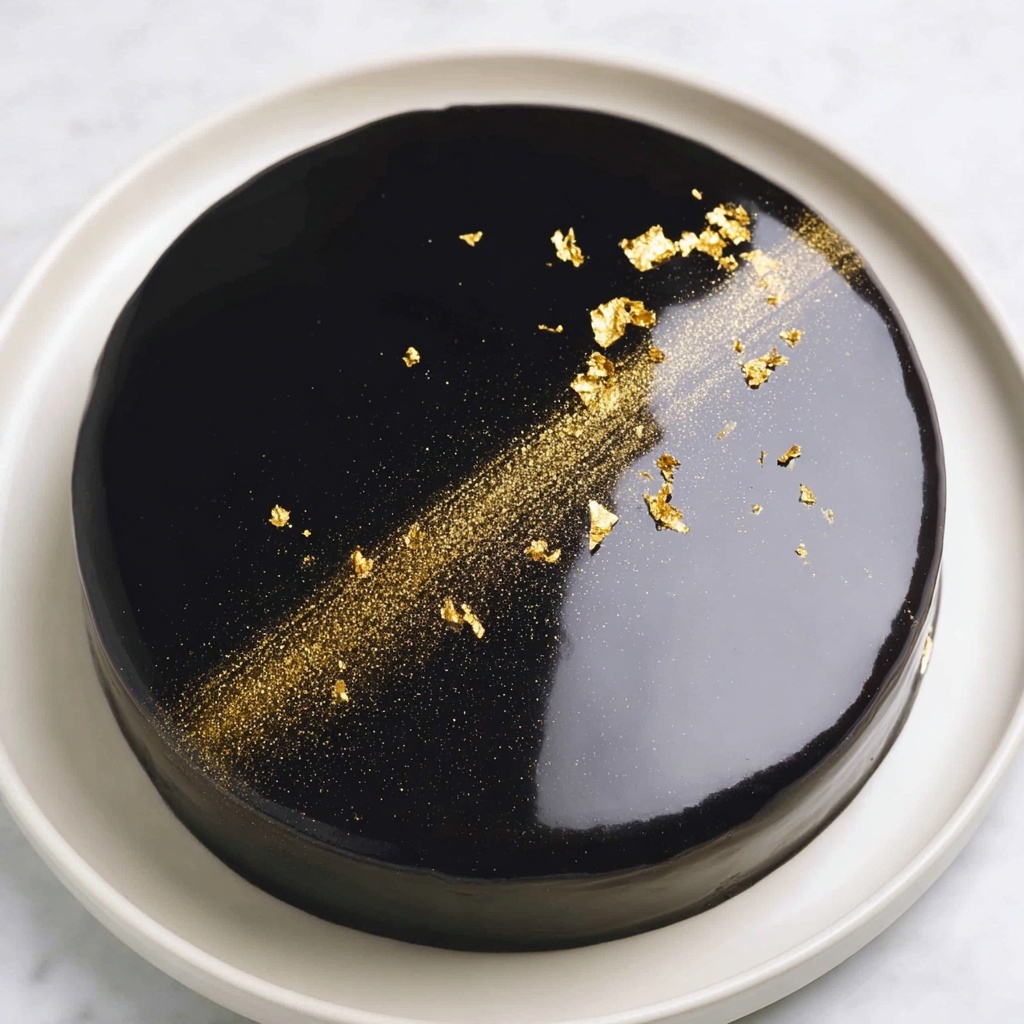
If you have a soft spot for rich, velvety desserts that feel like a little celebration in every bite, you are going to adore this Chocolate Mascarpone Dome Recipe. Picture a stunning dome of luscious chocolate mousse encasing a creamy mascarpone center, all resting on a crunchy biscuit base and finished with a glossy mirror glaze that looks almost too good to eat. This elegant dessert is as delightful to look at as it is to savor, making it a showstopper for any gathering or self-indulgent treat. Trust me, once you dive into this chocolate mascarpone dome recipe, it’s going to become a favorite you’ll want to recreate again and again.
Ingredients You’ll Need
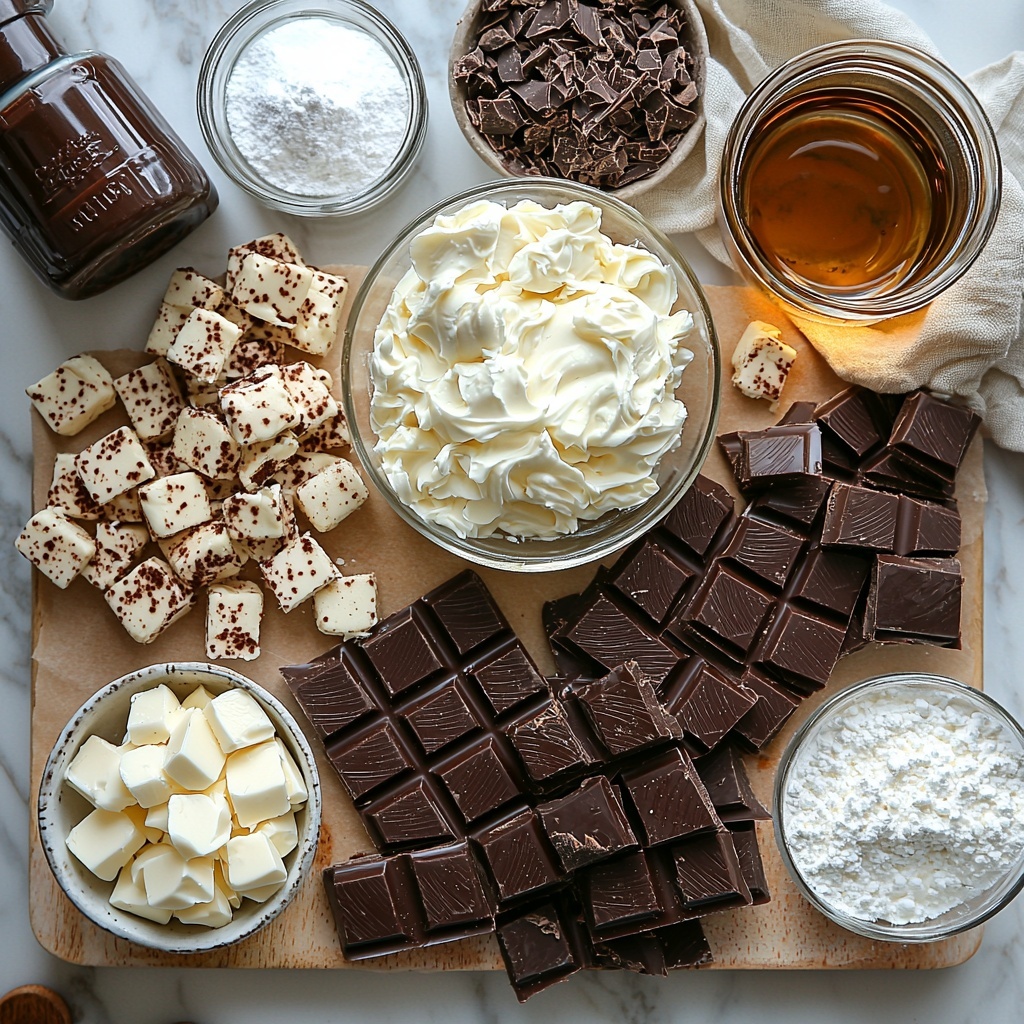
This recipe might look fancy, but the ingredients are wonderfully straightforward and each one plays a vital role in building those incredible layers of flavor and texture. From rich dark chocolate to smooth mascarpone cheese and buttery biscuit crumbs, every item contributes to making your chocolate mascarpone dome recipe irresistible.
- Dark chocolate (200g, 60–70%): The star ingredient that provides deep, intense chocolate flavor and a silky mousse base.
- Heavy cream (450ml total): Used in both mousses and the mirror glaze to add richness and lightness.
- Vanilla extract (2 tsp): Enhances the flavors with a warm, aromatic note.
- Sugar (1 tbsp and 2 tbsp powdered): Sweetens the chocolate mousse and mascarpone mousse gently without overpowering.
- Mascarpone cheese (250g): Gives the creamy mascarpone mousse its signature softness and subtle tang.
- Digestive biscuits or graham crackers (150g): For the crunchy base that adds delightful texture contrast.
- Unsalted butter (60g): Binds the biscuit crumbs into a firm yet tender crust.
- Glucose syrup (100g): Ensures the mirror glaze has that perfect shiny, smooth finish.
- Gelatin (8g powder + 40ml water): Important for setting the glaze to just the right consistency.
How to Make Chocolate Mascarpone Dome Recipe
Step 1: Creating the Chocolate Mousse
Start by melting your dark chocolate gently, either over a double boiler or in short bursts in the microwave, stirring often until gleaming and smooth. Then whip the heavy cream to soft peaks and carefully fold it into the melted chocolate in stages to keep it airy and light. Add a touch of vanilla, and if your chocolate is bitter, a little sugar to balance it. Pipe this luscious mixture into your piping bag and chill while you prepare the next step.
Step 2: Whipping Up the Mascarpone Mousse
Next comes the mascarpone mousse, which is pure creamy heaven. Whisk the mascarpone with powdered sugar and vanilla until perfectly smooth. Whip the heavy cream separately and gently fold it into this mix. This step is all about being gentle so your mousse stays fluffy and soft. Transfer this to another piping bag to keep things neat and easy for assembly.
Step 3: Assembling the Layers in Dome Molds
Now the fun begins: building those beautiful domes. Pipe chocolate mousse halfway into each silicone half-sphere mold. Tap the molds lightly to remove bubbles and create a smooth finish. Add a dollop of mascarpone mousse right in the center, then top with more chocolate mousse, smoothing out the surface with an offset spatula. Freeze these domes for at least 6 hours, or better yet, overnight, until they are fully set and firm.
Step 4: Making the Cookie Base
While the domes freeze, crush your digestive biscuits or graham crackers until fine crumbs. Mix them with melted butter until evenly moistened and press into a flat layer on a lined sheet. Chill until firm, then cut out rounds to match your dome size and keep refrigerated. This buttery base adds a perfect crunch and contrast to the creamy domes.
Step 5: Preparing the Mirror Glaze
For that dazzling finish, bloom the gelatin first by sprinkling it over cold water and letting it soften. Meanwhile, combine sugar, glucose syrup, water, and heavy cream in a saucepan and heat until boiling gently. Remove from heat, stir in chopped dark chocolate until melted, then mix in the gelatin until fully dissolved. Cool the glaze to just above room temperature to ensure it’s ready for glazing—glaze too hot and it can melt, too cold and it won’t spread beautifully.
Step 6: Glazing the Domes
Unmold your fully frozen domes and place them on a wire rack over a tray. Pour the mirror glaze evenly and watch it cascade down the smooth chocolate surface creating that perfect glossy dome. Let excess glaze drip off, then carefully transfer each dome onto a cookie base. Chill until serving so the glaze sets to a shiny, irresistible shell.
How to Serve Chocolate Mascarpone Dome Recipe
Garnishes
To elevate your dome, consider topping it with delicate chocolate shavings, fresh berries like raspberries or strawberries, or a sprinkle of finely chopped toasted nuts for added texture. Edible flowers or a dusting of cocoa powder also make for stunning garnishes that complement both the look and flavor of your chocolate mascarpone dome recipe.
Side Dishes
This dessert pairs beautifully with light accompaniments, such as an espresso or a glass of dessert wine like tawny port or vin santo. Fresh fruit sorbet or a citrus salad can balance the richness of the dome, ensuring each bite feels balanced and refreshing.
Creative Ways to Present
Serve your domes individually on delicate dessert plates, or place a few mini domes on a wooden board for shareable wow factor. For special occasions, consider clear glass cloches or boxes to showcase their glossy perfection. You can also experiment with layered colors in the mousse or add a surprise fruit puree center for a modern twist on the classic chocolate mascarpone dome recipe.
Make Ahead and Storage
Storing Leftovers
Your chocolate mascarpone domes keep beautifully covered in the refrigerator for up to 3 days. Make sure they’re sealed well to prevent the glaze from absorbing any fridge odors and to maintain that glossy finish and creamy texture.
Freezing
If you want to prepare in advance, dome assembly and freezing until firm is perfect. Once frozen, you can wrap them individually in plastic wrap and foil, then freeze for up to one month. Thaw overnight in the fridge before glazing and serving for best results.
Reheating
This dessert is best served chilled and does not require reheating. Bringing it to room temperature slightly before serving enhances the mousse’s flavors and texture but avoid warming it, which can cause the delicate mousse to collapse and the glaze to soften.
FAQs
Can I use milk chocolate instead of dark chocolate?
While milk chocolate will make the dome sweeter and creamier, it won’t have the same depth of flavor and structure as dark chocolate, so your mousse might be softer. For best results, stick to dark chocolate within the 60–70% cocoa range.
Is it possible to make this dessert dairy-free?
Because mascarpone and heavy cream are central to the texture and flavor, creating a dairy-free version would require substitutes like coconut cream and vegan cream cheese alternatives. It’s doable but will change the character of the dessert considerably.
How do I prevent air bubbles in the mousse?
Folding the whipped cream into the melted chocolate gently and slowly is key. Also, tapping the molds after filling helps release trapped air, resulting in a smooth, bubble-free dome.
Can I prepare the mirror glaze without glucose syrup?
You can substitute glucose syrup with corn syrup or golden syrup, which perform similarly by preventing crystallization and giving the glaze its shine.
What should I do if my mirror glaze is too thick?
If your glaze thickens too much before pouring, gently warm it up in short intervals and stir until it reaches a pourable consistency around 32–35°C. Avoid overheating as it may lose its shine and set poorly.
Final Thoughts
This Chocolate Mascarpone Dome Recipe is truly a masterpiece of texture and flavor harmony, combining rich chocolate, creamy mascarpone, and a crunchy base with a stunning glossy finish. It’s a dessert that’s sure to impress anyone lucky enough to taste it and a joy to make with its gratifying step-by-step process. I can’t wait for you to try it and make it your own signature dessert to share and savor time and again.
Print
Chocolate Mascarpone Dome Recipe
- Prep Time: 1 hour
- Cook Time: 10 minutes
- Total Time: 7 hours 10 minutes
- Yield: 6 domes
- Category: Dessert
- Method: Freezing with no direct primary cooking method but involving chilling/freezing and assembly, the key cooking technique is “No-Cook” with chilling/freezing steps; however, as the mousse involves melting chocolate and heating glaze, the primary method is best classified as “No-Cook” as the mousse sets by chilling and glaze sets at room temperature, no baking or frying used.
- Cuisine: French-inspired
- Diet: Vegetarian
Description
This elegant Chocolate Mascarpone Dome recipe features a luscious layered dessert with rich chocolate mousse, smooth mascarpone mousse, a crunchy biscuit base, and a stunning shiny mirror glaze. Perfect for special occasions, these individual domes combine creamy textures and deep chocolate flavor with a delicate, glossy finish.
Ingredients
For the Chocolate Mousse:
- 200g dark chocolate (60–70%)
- 300ml heavy cream
- 1 tsp vanilla extract
- 1 tbsp sugar (optional, depending on your chocolate)
For the Mascarpone Mousse:
- 250g mascarpone cheese
- 150ml heavy cream
- 2 tbsp powdered sugar
- 1 tsp vanilla extract
For the Base:
- 150g digestive biscuits or graham crackers
- 60g unsalted butter, melted
For the Mirror Glaze:
- 100g dark chocolate, chopped
- 100g sugar
- 100g glucose syrup (or corn syrup)
- 60ml water
- 60ml heavy cream
- 8g powdered gelatin
- 40ml cold water (to bloom gelatin)
Instructions
- Make the Chocolate Mousse: Melt the dark chocolate using a double boiler or microwave it in 30-second intervals, stirring until smooth. Let it cool slightly. Whip the heavy cream to soft peaks in a separate bowl, then fold in vanilla extract and sugar if using. Fold one-third of the whipped cream into the melted chocolate gently to lighten it, then fold in the remaining cream until fully combined and smooth. Transfer to a piping bag and refrigerate.
- Prepare the Mascarpone Mousse: Whisk mascarpone cheese with powdered sugar and vanilla extract in a bowl until smooth. Whip heavy cream to soft peaks separately, then fold it gently into the mascarpone mixture until combined. Transfer to a piping bag.
- Assemble the Layers in Dome Molds: Using silicone half-sphere molds, pipe chocolate mousse to fill halfway. Tap gently to level and remove air bubbles. Pipe mascarpone mousse into the center of each dome in a smaller amount. Fill the rest of the mold with more chocolate mousse, smoothing the tops with an offset spatula. Freeze domes for at least 6 hours or overnight until firm.
- Make the Cookie Base: Crush digestive biscuits or graham crackers into fine crumbs using a processor or by hand. Mix crumbs with melted butter until evenly moistened. Press mixture into a ½ inch thick even layer on a lined baking sheet. Chill until firm, then cut 6 rounds matching the dome mold diameter. Keep refrigerated.
- Prepare the Mirror Glaze: Bloom powdered gelatin by sprinkling over cold water and letting it sit 5-10 minutes. In a small saucepan, combine sugar, glucose syrup, water, and heavy cream and heat until it just begins to boil. Remove from heat, add chopped dark chocolate and stir until smooth. Add bloomed gelatin and stir until dissolved. Cool glaze to 32–35°C (body temperature) before use.
- Glaze the Domes: Unmold frozen domes and place on a wire rack over a tray. Pour mirror glaze evenly over each dome, ensuring full coverage. Let glaze drip and set for a few minutes. Using a spatula, carefully transfer each dome onto a cookie base. Refrigerate until serving.
Notes
- Ensure the mirror glaze is at the correct temperature (32–35°C) for a smooth, shiny coating.
- Use good quality dark chocolate for the best flavor in the mousse and glaze.
- Freezing the domes overnight helps achieve clean unmolding and optimal texture.
- You can substitute glucose syrup with corn syrup if needed.
- For easier assembly, make sure the cookie bases and domes are well chilled before glazing.
