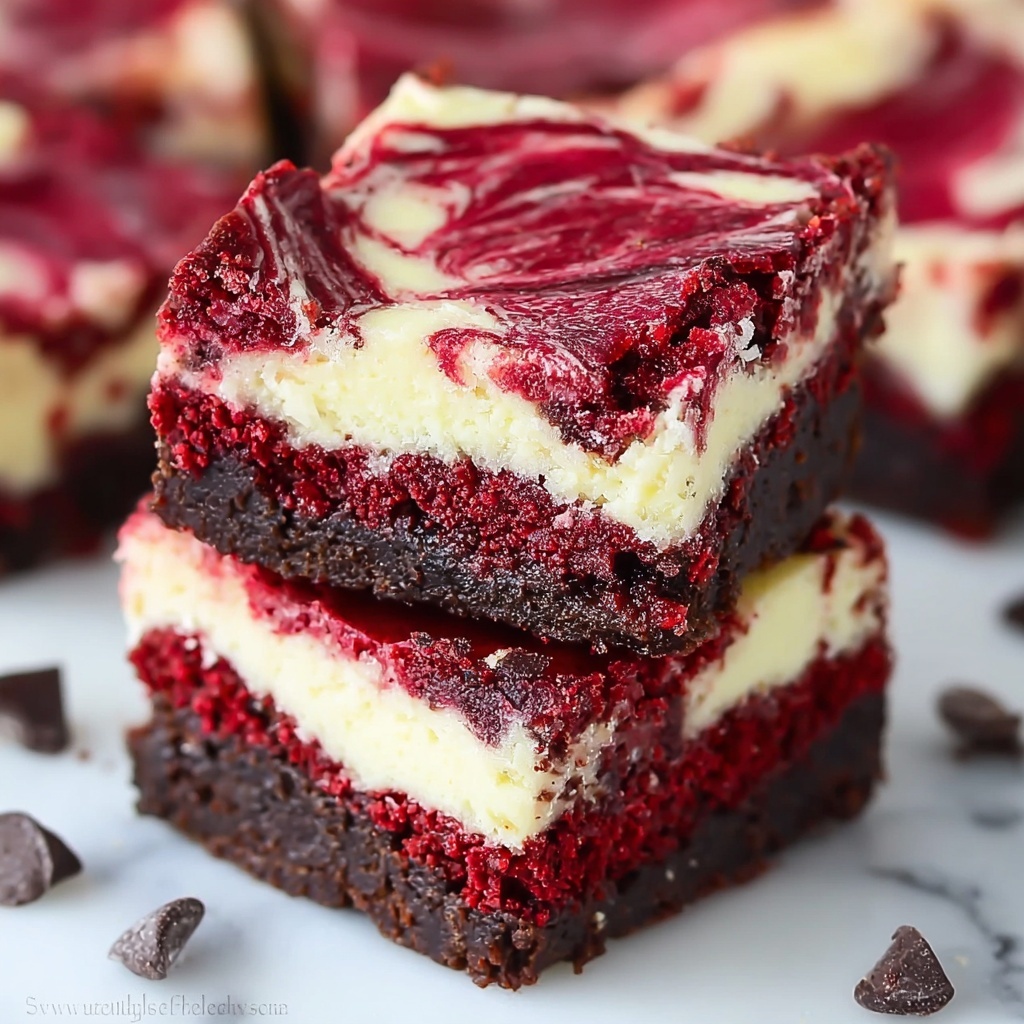
If you are looking to impress friends or simply indulge yourself, this Decadent Red Velvet Cheesecake Brownies Recipe is a total game-changer. It masterfully combines the rich, moist texture of classic red velvet brownies with the creamy, tangy swirl of a luscious cheesecake layer, delivering an irresistible treat that is as beautiful as it is delicious. Every bite bursts with vibrant color and flavors that feel both festive and comforting, making these brownies an absolute must-make whenever you want to treat yourself or those you love.
Ingredients You’ll Need
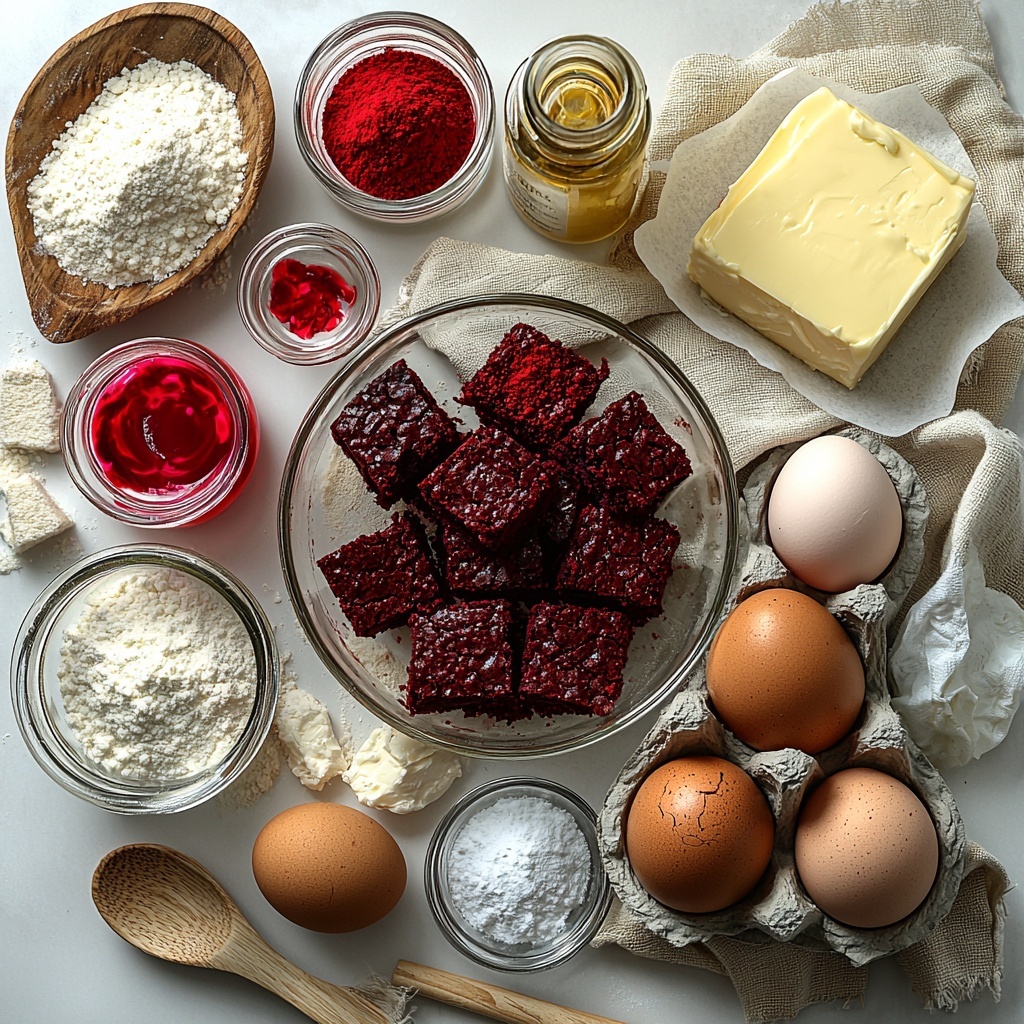
The magic of this Decadent Red Velvet Cheesecake Brownies Recipe lies in its simple but carefully chosen ingredients, each adding a unique element to the final result. From the deep cocoa undertone to the creamy cheesecake swirl, every component plays a crucial role in balancing flavor and texture.
- 1/2 cup unsalted butter, melted: Adds richness and moisture to the brownie base.
- 1 cup granulated sugar: Provides sweetness and helps create a tender crumb.
- 2 large eggs: Bind the ingredients together and add structure.
- 1 tablespoon red food coloring: Gives the brownies that signature vibrant red velvet hue.
- 1 teaspoon vanilla extract: Enhances the overall flavor with warm, sweet notes.
- 1 cup all-purpose flour: The foundation that holds the brownies together.
- 1/4 cup unsweetened cocoa powder: Adds a subtle, rich chocolate background essential to red velvet.
- 1/4 teaspoon salt: Balances sweetness and deepens flavor.
- 1/4 teaspoon baking powder: Provides just enough lift for a tender texture.
- 8 oz cream cheese, softened: The star of the cheesecake swirl, lending creaminess and tang.
- 1/4 cup granulated sugar: Sweetens the cheesecake filling perfectly.
- 1 large egg: Helps the cheesecake layer set nicely.
- 1/2 teaspoon vanilla extract: Rounds out the cheesecake’s flavor with a hint of warmth.
How to Make Decadent Red Velvet Cheesecake Brownies Recipe
Step 1: Get Your Oven and Pan Ready
Start by preheating your oven to 350°F (175°C), which is the perfect temperature to bake these brownies evenly without drying them out. Grease an 8×8-inch baking pan and line it with parchment paper for an easy release. This prep ensures your brownies come out clean and intact every time.
Step 2: Whisk Together the Wet Brownie Ingredients
In a medium bowl, blend the melted butter and 1 cup of granulated sugar until the mixture is smooth and glossy. Then, add in the eggs, red food coloring, and vanilla extract. Whisk it all together until everything is beautifully combined, turning the mixture into a vibrant red liquid that signals the start of something delicious.
Step 3: Combine the Dry Ingredients
In a separate bowl, sift together the flour, cocoa powder, salt, and baking powder. This keeps any lumps at bay and ensures that the cocoa and baking powder distribute evenly throughout the batter, which is key for that classic red velvet flavor and texture.
Step 4: Bring Wet and Dry Ingredients Together
Gradually add the dry ingredients to your wet mixture, stirring gently but thoroughly until the batter is smooth and consistent. Avoid overmixing to keep your brownies tender and moist. Pour this luscious red velvet batter into the prepared pan and spread it evenly to create a perfect base layer.
Step 5: Prepare the Cheesecake Layer
Using a clean bowl, beat the softened cream cheese with 1/4 cup sugar, 1 egg, and 1/2 teaspoon vanilla extract until the mixture is creamy and smooth without lumps. This cheesecake filling will add a dreamy richness that contrasts marvelously with the dense brownie base.
Step 6: Create the Signature Swirl
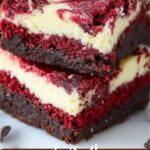
Drop spoonfuls of the cheesecake mixture on top of the brownie batter in the pan. Then, take a knife or a skewer and gently swirl the cheesecake filling into the red velvet layer. This creates that gorgeous marbled effect and guarantees each bite has the perfect balance of cheesecake and brownie.
Step 7: Bake to Perfection
Bake the brownies for 30-35 minutes. You’ll know they’re done when a toothpick inserted in the center comes out with just a few moist crumbs. This timing is critical for that luscious fudgy texture combined with a perfectly set cheesecake layer.
Step 8: Cool and Slice
Allow the brownies to cool completely in the pan before slicing. This helps the cheesecake swirl set and keeps your brownies from falling apart. Once cooled, cut into 12 generous squares and prepare to savor every delicious bite.
How to Serve Decadent Red Velvet Cheesecake Brownies Recipe
Garnishes
For an extra touch of elegance, sprinkle these brownies with powdered sugar or top with a light drizzle of white chocolate. Fresh raspberries or a dollop of whipped cream on the side also elevate the taste and presentation, making each bite even more delightful.
Side Dishes
Serve these brownies alongside a scoop of vanilla ice cream or a rich cup of coffee or hot cocoa. The cool creaminess or warm beverage perfectly contrasts the tangy cheesecake and rich red velvet flavors, making your dessert experience even more indulgent.
Creative Ways to Present
Try layering the brownies in a clear dessert trifle with extra cream cheese frosting and crushed walnuts for texture. You can also cut them into bite-sized pieces and arrange on a dessert platter with fresh berries for a party-friendly presentation that will wow your guests.
Make Ahead and Storage
Storing Leftovers
Store any leftover Decadent Red Velvet Cheesecake Brownies in an airtight container at room temperature for up to 3-4 days. This keeps them moist and flavorful, making it easy to enjoy them a day or two after baking without losing any of their charm.
Freezing
You can freeze the brownies for longer storage by wrapping them tightly in plastic wrap and placing them in a freezer-safe bag or container. They’ll keep well for up to 2 months. When you’re ready to indulge, thaw them overnight in the refrigerator for the perfect texture.
Reheating
To warm your brownies, pop them in the microwave for 15-20 seconds or heat briefly in a low oven. This revives their softness and brings out the luscious cream cheese flavor, almost as if they were freshly baked.
FAQs
Can I use a different type of food coloring?
Absolutely! Gel food coloring works great if you want a more vibrant color without adding extra liquid. Natural food coloring from beet juice is also an option for a subtle red hue.
What if I don’t have cream cheese? Can I substitute it?
Cream cheese is essential for the classic cheesecake texture and tang in this recipe. However, mascarpone can work as a substitute but expect a slightly milder flavor.
Can these brownies be made gluten-free?
Yes! Simply swap the all-purpose flour for a gluten-free flour blend that’s designed for baking. This will maintain the right texture and keep the brownies delicious for gluten-sensitive friends.
How do I make sure the cheesecake doesn’t overbake?
Keep a close eye during the last few minutes of baking and test with a toothpick. The cheesecake swirl should look set but still slightly soft in the center to avoid drying out.
Can I double the recipe for a larger batch?
Definitely! Just use a larger pan (like 9×13 inches) and adjust the baking time accordingly, checking for doneness around 40-45 minutes.
Final Thoughts
This Decadent Red Velvet Cheesecake Brownies Recipe is a true dessert masterpiece that’s both inviting and unforgettable. Whether for a special occasion or simply to satisfy a sweet craving, these brownies are guaranteed to brighten your day and delight anyone lucky enough to share them. So go ahead, dive in, and let these rich, creamy, and colorful treats become your new favorite dessert tradition.
Print
Decadent Red Velvet Cheesecake Brownies Recipe
- Prep Time: 15 minutes
- Cook Time: 35 minutes
- Total Time: 50 minutes
- Yield: 12 servings
- Category: Dessert
- Method: Baking
- Cuisine: American
Description
These Decadent Red Velvet Cheesecake Brownies combine the rich, fudgy texture of classic brownies with a creamy, tangy cheesecake swirl, finished with the vibrant color and subtle cocoa flavor characteristic of red velvet. Perfect for dessert lovers seeking a luxurious treat that’s both visually stunning and irresistibly delicious.
Ingredients
Brownie Batter
- 1/2 cup unsalted butter, melted
- 1 cup granulated sugar
- 2 large eggs
- 1 tablespoon red food coloring
- 1 teaspoon vanilla extract
- 1 cup all-purpose flour
- 1/4 cup unsweetened cocoa powder
- 1/4 teaspoon salt
- 1/4 teaspoon baking powder
Cheesecake Layer
- 8 oz cream cheese, softened
- 1/4 cup granulated sugar
- 1 large egg
- 1/2 teaspoon vanilla extract
Instructions
- Preheat and prepare pan: Preheat the oven to 350°F (175°C). Grease and line an 8×8-inch baking pan with parchment paper to ensure easy removal of the brownies.
- Mix wet ingredients for brownie: In a medium bowl, combine the melted butter and 1 cup sugar until smooth. Whisk in the eggs, red food coloring, and 1 teaspoon vanilla extract until fully incorporated.
- Combine dry ingredients: In a separate bowl, whisk together the flour, cocoa powder, salt, and baking powder. Gradually add these dry ingredients to the wet mixture, stirring until just combined to form the brownie batter.
- Assemble brownie base: Pour the batter evenly into the prepared pan, spreading it out gently to create a smooth surface.
- Prepare cheesecake layer: In another bowl, beat the softened cream cheese with 1/4 cup sugar, 1 egg, and 1/2 teaspoon vanilla extract until smooth and creamy.
- Create swirls: Drop spoonfuls of the cheesecake mixture evenly over the brownie batter. Use a knife or skewer to swirl the cheesecake filling into the brownie layer, creating a marbled effect.
- Bake: Bake the brownies in the preheated oven for 30-35 minutes, or until a toothpick inserted into the center comes out with just a few moist crumbs attached.
- Cool and serve: Allow the brownies to cool completely in the pan on a wire rack before cutting into 12 squares and serving.
Notes
- Ensure the cream cheese is softened to room temperature for easy blending without lumps.
- Do not overmix the batter once dry ingredients are added to keep brownies tender.
- You can substitute natural red food coloring made from beet juice for a more natural option.
- Store baked brownies in an airtight container in the refrigerator for up to 4 days.
- For easier slicing, chill the brownies after baking before cutting.


