
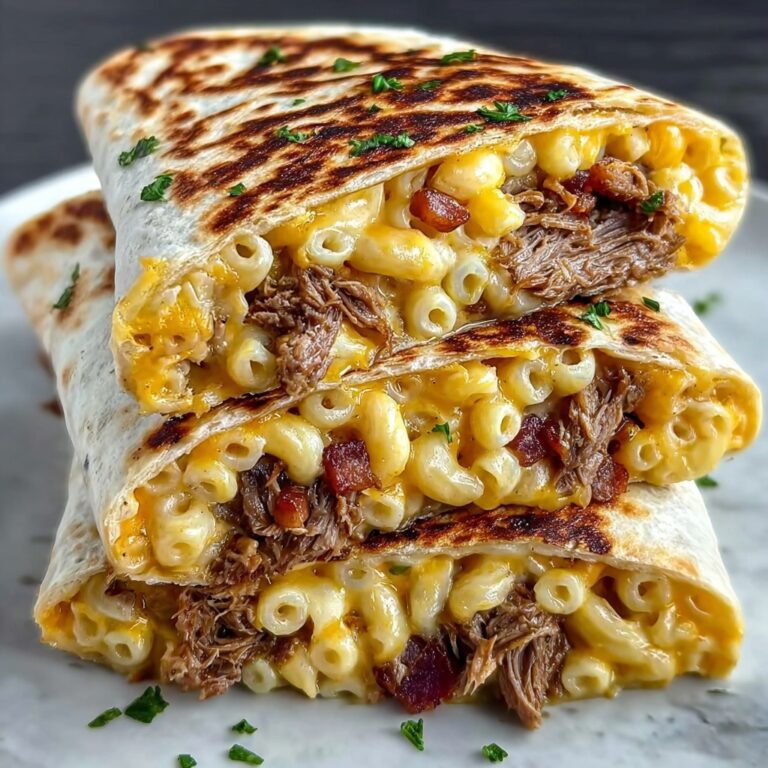
If you’re craving something irresistibly cheesy, bursting with savory bacon, and infused with the warm richness of garlic butter, then this Garlic Butter Bacon Cheeseburger Roll-Ups Recipe is about to become your new favorite snack or appetizer. Imagine tender flour tortillas rolled tightly around crispy bacon and a melty blend of cheddar and mozzarella, all brushed with a fragrant garlic butter that browns to perfection in the oven. Whether you’re hosting friends or just treating yourself, these roll-ups deliver a perfect balance of comfort and excitement in every bite.
Ingredients You’ll Need
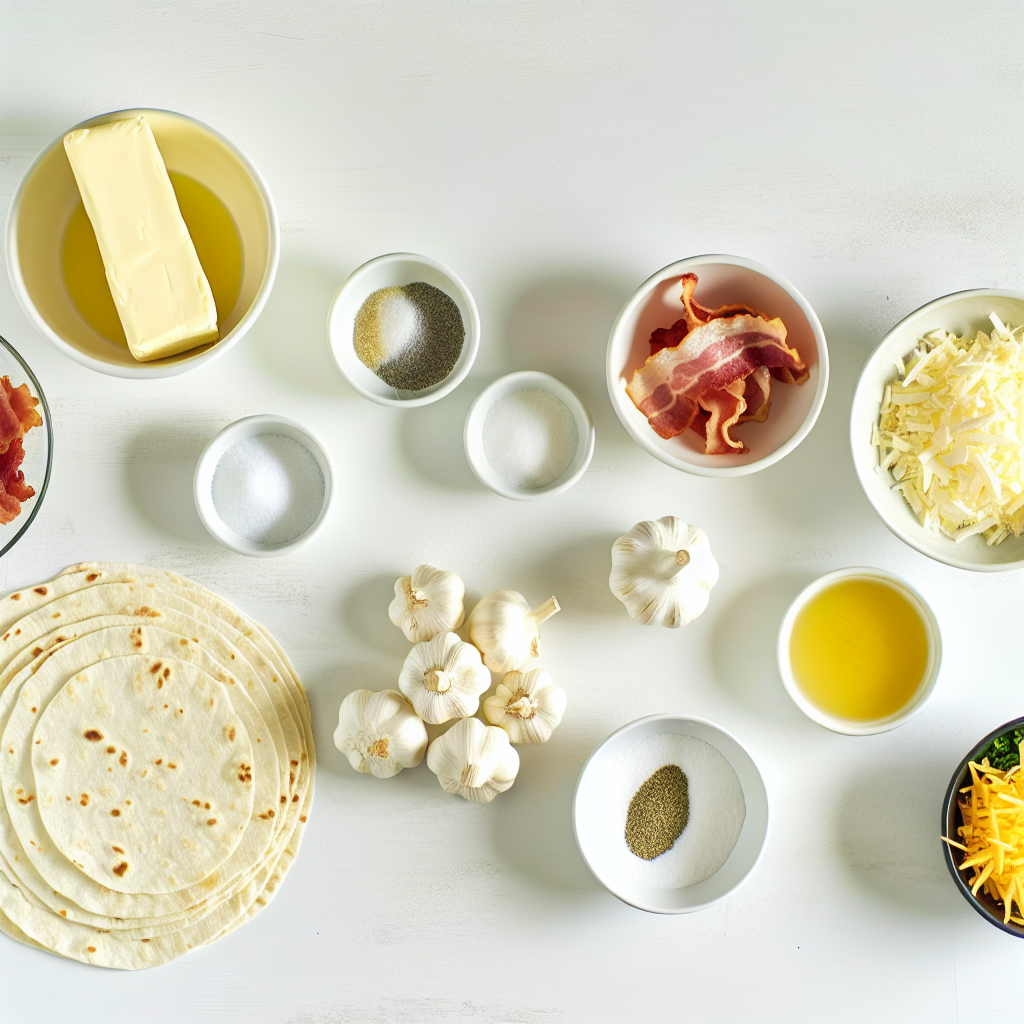
The beauty of the Garlic Butter Bacon Cheeseburger Roll-Ups Recipe is in its simplicity. Each ingredient plays its part in layering flavor, texture, and color, turning everyday pantry staples into a show-stopping treat you’ll crave again and again.
- 1/4 cup unsalted butter, melted: This creates the rich garlic butter that infuses the roll-ups with buttery goodness.
- 2 cloves garlic, minced: Fresh garlic adds that unmistakable punch and fragrant aroma you can’t resist.
- 1 teaspoon dried parsley: A subtle herbaceous note that brightens the richness.
- 1/2 teaspoon salt: Enhances all the flavors so they pop perfectly.
- 1/4 teaspoon black pepper: Adds a gentle warmth to offset the creamy cheese.
- 6 large flour tortillas: Soft and pliable, the perfect vessel to hold all the yum.
- 12 slices bacon, cooked and crumbled: Crispy, smoky bacon makes every bite unforgettable.
- 1 cup shredded cheddar cheese: Sharp and melty cheddar amps up the cheeseburger vibe.
- 1/2 cup shredded mozzarella cheese: Mozzarella gives that gooey, stretchy texture lovers adore.
- 2 tablespoons chopped fresh chives (optional): Adds a fresh, mild onion flavor and a pop of color.
How to Make Garlic Butter Bacon Cheeseburger Roll-Ups Recipe
Step 1: Prepare the Garlic Butter
Start by mixing melted butter with minced garlic, dried parsley, salt, and black pepper in a small bowl. This mixture will coat the tortillas, soaking them in fragrant garlic butter that’s central to the recipe’s flavor magic.
Step 2: Preheat Your Oven
Set your oven to 190°C (375°F). A well-heated oven ensures your roll-ups come out golden, crispy, and the cheese inside melts perfectly.
Step 3: Assemble the Tortillas
Lay the tortillas flat on your work surface, ready for the delicious layering. This sets the stage for the roll-ups, making assembly quick and easy.
Step 4: Brush with Garlic Butter
Generously brush each tortilla with the prepared garlic butter. This step guarantees every bite has that buttery, garlicky hit that takes this dish to the next level.
Step 5: Layer Bacon and Cheese
Sprinkle crumbled bacon evenly over the tortillas, followed by a generous amount of shredded cheddar and mozzarella cheese. Scatter fresh chopped chives on top if you’re using them for added vibrancy and flavor.
Step 6: Roll ‘Em Up Tight
Starting at one edge, tightly roll the tortillas into spirals. Rolling snug ensures the fillings don’t fall out and creates those beautiful layered swirls once you slice them.
Step 7: Arrange on a Baking Sheet
Place each rolled tortilla seam-side down on a parchment-lined baking sheet. This keeps them sealed while baking and helps the bottoms crisp up nicely.
Step 8: Brush with Remaining Garlic Butter
Brush the tops of the roll-ups with any leftover garlic butter for an extra golden finish and a burst of flavor on every bite.
Step 9: Bake Until Crispy
Bake for 12 to 15 minutes, or until the tortillas turn a gorgeous golden brown and the cheese inside becomes delectably melty and bubbly. Your kitchen will smell absolutely amazing.
Step 10: Cool and Slice
Remove from the oven and let the roll-ups cool just a few minutes to set. Then slice into bite-sized pieces, creating perfect little pinwheels brimming with cheesy, bacon goodness.
Step 11: Serve and Enjoy
Arrange the slices on a platter and serve hot. These roll-ups are best enjoyed fresh, with all that warm cheesy goodness and crispy garlic butter shell.
How to Serve Garlic Butter Bacon Cheeseburger Roll-Ups Recipe
Garnishes
Add a sprinkle of fresh chives or finely chopped parsley on top for a pop of color and fresh herby flavor. A light drizzle of your favorite spicy ketchup or a dollop of creamy ranch makes a fun dipping option that guests will love.
Side Dishes
Pair these roll-ups with a crisp green salad for balance, or serve alongside classic potato chips for an all-out comfort food combo. A side of pickles adds that perfect tangy crunch, cutting through the richness deliciously.
Creative Ways to Present
For parties, arrange the bite-sized roll-up slices on a large platter with toothpicks for easy grabbing. You can also serve them warm in small ramekins topped with extra cheese for a gooey presentation or even pack them as an indulgent lunchbox treat!
Make Ahead and Storage
Storing Leftovers
Cool any leftovers completely before storing in an airtight container in the refrigerator. They will keep well for up to 3 days, making for an easy next-day snack or light dinner.
Freezing
If you want to enjoy this Garlic Butter Bacon Cheeseburger Roll-Ups Recipe later, freeze the uncooked roll-ups on a baking sheet until solid, then transfer to a freezer bag for up to 1 month. Bake directly from frozen, adding a few extra minutes to the cooking time.
Reheating
To reheat, pop the roll-ups in a preheated oven at 180°C (350°F) for 8-10 minutes until heated through and the tortillas regain their crispness. Avoid microwaving to keep the textures just right.
FAQs
Can I use other types of cheese?
Absolutely! While cheddar and mozzarella are classic, feel free to experiment with Monterey Jack, pepper jack for some spice, or even a bit of smoked gouda for a smoky twist.
Is it possible to make this recipe vegetarian?
You could simply omit the bacon and add sautéed mushrooms, caramelized onions, or your favorite veggies for a tasty vegetarian alternative while still enjoying the garlicky cheesy goodness.
Can I prepare these ahead of time for a party?
Yes! Assemble the roll-ups and store them covered in the fridge for a few hours before baking. Just brush with garlic butter and bake when you’re ready to serve for fresh, warm roll-ups.
What’s the best way to make bacon crispy for this recipe?
Cooking bacon in the oven on a foil-lined pan ensures even crispiness and less mess. Once cooled, crumble it evenly over the tortillas for perfect texture in every bite.
Can I use corn tortillas instead of flour tortillas?
Flour tortillas are best here due to their flexibility and ability to roll without cracking, but if you prefer corn tortillas, warm them thoroughly to prevent breakage during rolling.
Final Thoughts
I can’t recommend the Garlic Butter Bacon Cheeseburger Roll-Ups Recipe enough for anyone who loves bold flavors and easy, satisfying dishes. Once you try this, it will be your go-to for game day, quick dinners, or any time you want to wow with minimal effort. Grab those ingredients, start rolling, and get ready to enjoy a snack that’s pure cheesy, garlicky comfort in every bite!
Print
Garlic Butter Bacon Cheeseburger Roll-Ups Recipe
- Prep Time: 15 minutes
- Cook Time: 15 minutes
- Total Time: 30 minutes
- Yield: 6 servings
- Category: Appetizer
- Method: Baking
- Cuisine: American
Description
Garlic Butter Bacon Cheeseburger Rollups are a delicious and savory appetizer or snack featuring flour tortillas brushed with a flavorful garlic butter mixture, filled with crispy bacon and melted cheddar and mozzarella cheeses, then baked until golden and bubbly. Perfect for parties or a tasty treat any time!
Ingredients
Garlic Butter Mixture
- 1/4 cup unsalted butter, melted
- 2 cloves garlic, minced
- 1 teaspoon dried parsley
- 1/2 teaspoon salt
- 1/4 teaspoon black pepper
Rollup Filling
- 6 large flour tortillas
- 12 slices bacon, cooked and crumbled
- 1 cup shredded cheddar cheese
- 1/2 cup shredded mozzarella cheese
- 2 tablespoons chopped fresh chives (optional)
Instructions
- Prepare the garlic butter: In a small bowl, combine the melted butter, minced garlic, dried parsley, salt, and black pepper. Mix well and set aside to infuse the flavors.
- Preheat the oven: Set your oven to 190°C (375°F) to get it ready for baking the rollups.
- Arrange tortillas: Lay out the flour tortillas flat on a clean surface for easy assembly.
- Brush tortillas: Generously brush each tortilla with the prepared garlic butter mixture, ensuring even coverage for flavor.
- Add bacon and cheese: Sprinkle crumbled cooked bacon evenly over tortillas, then top with shredded cheddar and mozzarella cheese. Add chopped fresh chives if desired for a fresh touch.
- Roll up tortillas: Starting from one edge, tightly roll each tortilla up into a spiral shape, keeping the filling secure inside.
- Place on baking sheet: Arrange rolled tortillas seam-side down on a parchment-lined baking sheet to prevent unrolling during baking.
- Brush tops with butter: Brush any remaining garlic butter on top of the rollups to enhance flavor and promote browning.
- Bake: Bake in the preheated oven for 12-15 minutes or until tortillas are golden brown, crisp, and the cheeses are melted and bubbly.
- Cool slightly: Remove from oven and let the rollups cool for a few minutes to set and make slicing easier.
- Slice and serve: Slice the rollups into bite-sized pieces, arrange on a serving platter, and serve immediately to enjoy the melty, crispy goodness.
Notes
- You can substitute flour tortillas with whole wheat or gluten-free tortillas to suit dietary needs.
- Make sure to cook the bacon until crispy before crumbling for optimal texture.
- Chives are optional but add a nice fresh garnish and mild onion flavor.
- These rollups are best served warm, straight from the oven for gooey cheese and crisp texture.
- Store leftovers in an airtight container and reheat in the oven or air fryer to preserve crispiness.


