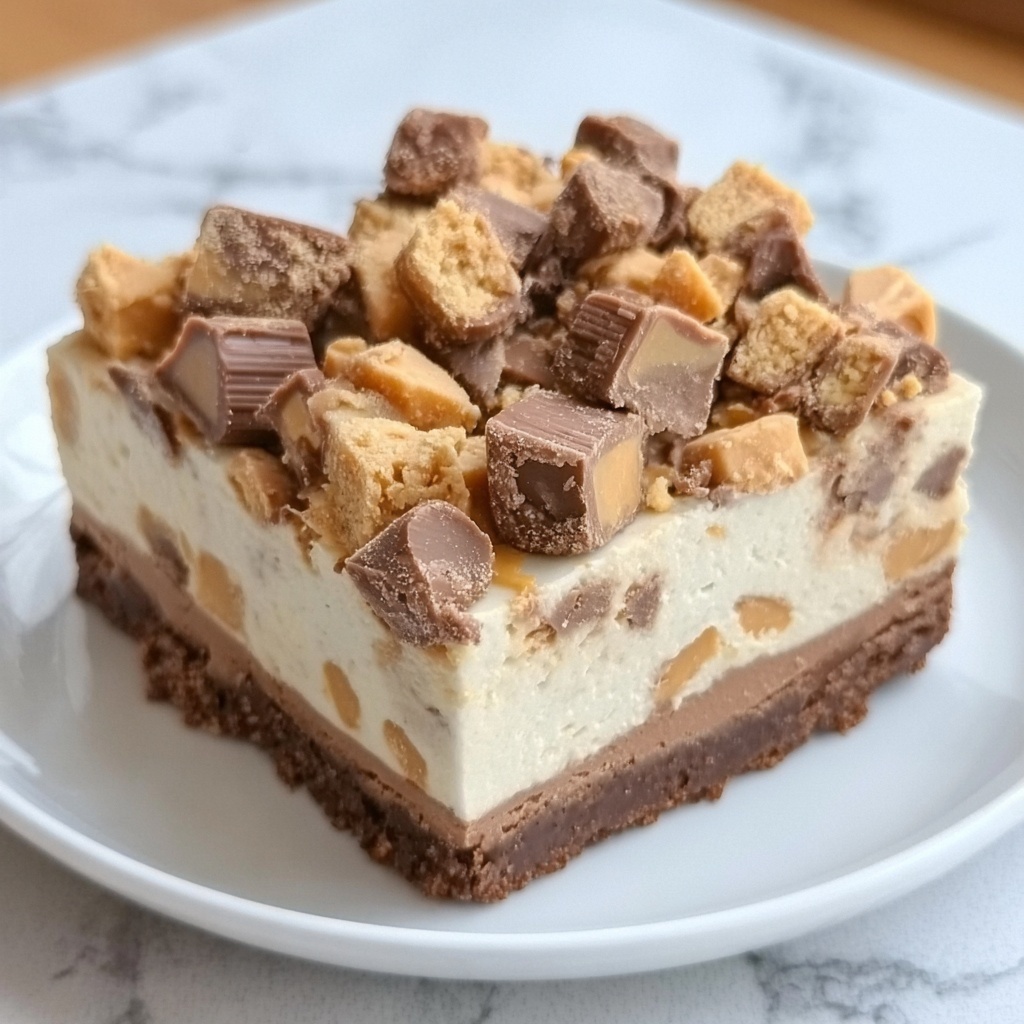
If you have a sweet tooth and love indulgent desserts, you are going to be head over heels for this Homemade No-Bake Twix Cheesecake Recipe. Imagine the crunch of a chocolate cookie crust paired with a creamy, fluffy cheesecake filling all topped with those irresistible chunks of Twix candy bars. This dessert is like all your favorite treats in one slice, and the best part is it’s totally no-bake! Perfect for warm days or when you want to whip up something impressive without firing up the oven.
Ingredients You’ll Need
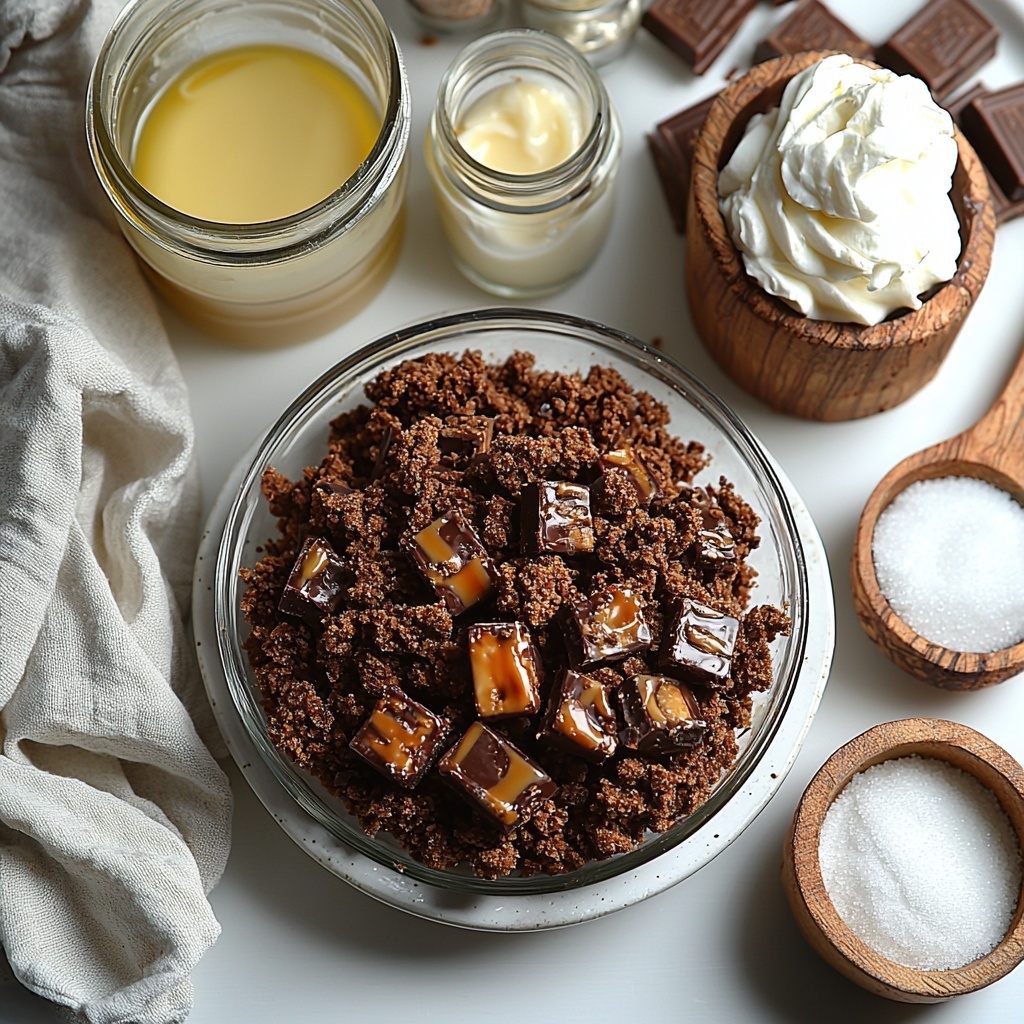
Gathering the ingredients for this recipe is a breeze because everything is straightforward yet critical to creating that iconic flavor and texture combo. Each component plays a specific role to balance richness, sweetness, and crunch in this no-bake marvel.
- 2 cups Chocolate cookies (crushed): This forms the crunchy, chocolatey base that holds everything together.
- 1/2 cup Butter (melted): Acts as the binder for the crust, adding richness and helping it set perfectly.
- 2 (8 oz) packages Cream cheese (softened): The creamy heart of the cheesecake, providing that smooth and tangy foundation.
- 1 cup Whipped cream: Lightens up the cheesecake filling, giving it an airy texture that’s downright dreamy.
- 1/2 cup Sugar: Sweetens the cheesecake just right without overpowering the flavors.
- 1 tsp Vanilla extract: Boosts the flavor depth with its warm, aromatic notes.
- 1 cup Twix bars (chopped): The pièce de résistance for the topping, adding a hit of caramel, chocolate, and crunch.
How to Make Homemade No-Bake Twix Cheesecake Recipe
Step 1: Prepare the crust
Start by combining those crushed chocolate cookies with the melted butter in a bowl. Stir them well until every crumb is coated and ready to pack into your springform pan. Press this mixture firmly and evenly into the bottom to form an even layer—this crust is the delicious foundation for the whole cheesecake! Pop it into the fridge to chill and firm up while you prepare the filling.
Step 2: Make the cheesecake filling
In a large bowl, beat the softened cream cheese until it’s silky smooth—no lumps here! Then add the sugar and vanilla extract, continuing to mix until everything is fluffy and well combined. Gently fold in the whipped cream, which makes the filling incredibly light and creamy, perfect for that melt-in-your-mouth texture you want in a cheesecake.
Step 3: Assemble the cheesecake
Take your chilled cookie crust out of the fridge and carefully pour the cheesecake filling over it. Use a spatula to smooth the surface so it looks as good as it tastes. This layer is your creamy canvas ready for the crowning glory.
Step 4: Add the topping
Now comes the fun part—sprinkle the chopped Twix bars evenly across the top. These pieces add a beautiful mix of chocolate, caramel, and crunch, making every bite exciting and satisfying.
Step 5: Chill
Finally, refrigerate your assembled cheesecake for at least 4 hours. This chilling step is crucial for the filling to fully set and for the flavors to marry perfectly, ensuring a slice that holds its shape but feels velvety on the tongue.
Step 6: Serve
Ready to indulge? Slice your Homemade No-Bake Twix Cheesecake Recipe and serve chilled. The combination of textures and flavors is pure magic!
How to Serve Homemade No-Bake Twix Cheesecake Recipe
Garnishes
While this cheesecake is delicious on its own, adding a few extra touches can really elevate presentation and taste. Try a light dusting of cocoa powder or a drizzle of caramel sauce. A few extra chopped Twix pieces or a sprinkle of chopped nuts on top can add even more texture and visual appeal.
Side Dishes
This cheesecake pairs wonderfully with a dollop of freshly whipped cream or a scoop of vanilla ice cream. If you want to balance sweetness, serve it alongside a cup of strong coffee or a tart berry compote for contrast and freshness.
Creative Ways to Present
Consider serving mini versions in clear dessert cups layered with crushed cookies and caramel sauce for a fun twist. Or plate slices with a wedge of fruit like strawberries or raspberries for a pop of color that looks stunning and complements the rich flavors.
Make Ahead and Storage
Storing Leftovers
Your Homemade No-Bake Twix Cheesecake Recipe keeps beautifully in the fridge for 3-4 days. Make sure it’s covered well with plastic wrap or stored in an airtight container to prevent it from drying out or absorbing other fridge odors.
Freezing
This cheesecake freezes well if you want to make it ahead for special occasions. Wrap it tightly in plastic wrap and then foil to protect against freezer burn. Stored properly, it can keep for up to 1 month. Thaw it overnight in the fridge before serving for the best texture.
Reheating
Since this is a no-bake cheesecake, it’s best enjoyed chilled. Avoid reheating as it can alter the creamy texture and flavors. Simply serve straight from the fridge for a perfect slice every time.
FAQs
Can I use a different type of cookie for the crust?
Absolutely! While chocolate cookies provide a rich base that complements the Twix topping, you can experiment with graham crackers or even shortbread cookies depending on your flavor preference.
Do I need a springform pan for this recipe?
Using a springform pan makes it easier to remove the cheesecake without damaging it. However, if you don’t have one, you can use a regular cake pan lined with parchment paper for easier removal.
Can I make this cheesecake vegan or dairy-free?
It’s possible to substitute cream cheese and whipped cream with vegan alternatives. Just be sure to select ones that whip well and hold shape so your filling stays fluffy and creamy.
How do I keep the Twix pieces from sinking into the cheesecake?
Chilling the crust before adding the filling helps the layers stay distinct. Also, sprinkle the Twix pieces on top only after the filling is fully poured and smoothed to keep that beautiful crunchy topping intact.
Is this recipe suitable for kids?
Yes! The Homemade No-Bake Twix Cheesecake Recipe is a fantastic treat for kids and adults alike, offering a sweet and fun way to enjoy classic candy bars with the creamy indulgence of cheesecake.
Final Thoughts
If you’re craving a dessert that combines ease, deliciousness, and that wow factor, the Homemade No-Bake Twix Cheesecake Recipe is your new best friend. It’s simple to prepare, perfect for any occasion, and absolutely melts in your mouth with every bite. Don’t wait to give this crowd-pleaser a try—you’ll be coming back for seconds, guaranteed!
Print
Homemade No-Bake Twix Cheesecake Recipe
- Prep Time: 15 minutes
- Cook Time: 0 minutes
- Total Time: 4 hours 15 minutes
- Yield: 8 servings
- Category: Dessert
- Method: No-Cook
- Cuisine: American
Description
This Homemade No-Bake Twix Cheesecake is a delightful dessert featuring a crunchy chocolate cookie crust, a creamy and fluffy cheesecake filling, and a generous topping of chopped Twix bars. Perfect for chocolate and caramel lovers, this easy-to-make cheesecake requires no baking and sets quickly in the refrigerator, making it an ideal treat for any occasion.
Ingredients
For the crust:
- 2 cups chocolate cookies, crushed
- 1/2 cup butter, melted
For the cheesecake filling:
- 2 (8 oz) packages cream cheese, softened
- 1 cup whipped cream
- 1/2 cup sugar
- 1 tsp vanilla extract
For the topping:
- 1 cup Twix bars, chopped
Instructions
- Prepare the crust: In a bowl, combine the crushed chocolate cookies with melted butter until the mixture is evenly moistened. Press this mixture firmly into the base of a springform pan to form an even crust layer. Refrigerate for about 15 minutes to allow the crust to set and become firm.
- Make the cheesecake filling: In a large mixing bowl, beat the softened cream cheese until it becomes smooth and creamy. Add the sugar and vanilla extract, continuing to beat until well incorporated. Gently fold in the whipped cream to keep the mixture light and fluffy, ensuring a smooth cheesecake texture.
- Assemble the cheesecake: Pour the prepared cheesecake filling evenly over the chilled cookie crust. Use a spatula to smooth the top surface for an attractive finish.
- Add the topping: Sprinkle the chopped Twix bars evenly over the surface of the cheesecake filling, distributing the caramel and chocolate pieces for a flavorful topping.
- Chill: Place the assembled cheesecake in the refrigerator and chill for at least 4 hours, or until the cheesecake is fully set and firm enough to slice.
- Serve: Once set, carefully remove the cheesecake from the springform pan, slice into portions, and serve chilled. Enjoy the rich and creamy cheesecake combined with the crunchy Twix topping.
Notes
- Ensure the cream cheese is softened to room temperature for easier mixing and a smoother texture.
- Use fresh whipped cream or store-bought whipped topping according to your preference.
- To crush the cookies, place them in a sealed plastic bag and use a rolling pin or pulse in a food processor.
- Allowing the crust to chill before adding the filling helps maintain its structure and prevents it from becoming soggy.
- Store any leftover cheesecake covered in the refrigerator for up to 3 days.
- For an extra decadent touch, drizzle melted chocolate over the Twix topping before chilling.


