
If you’ve been on the hunt for an incredibly easy, delicious, and wholesome bread that doesn’t require hours of kneading or fancy equipment, you’ve come to the right place. This No Knead Seeded Oat Bread Recipe is a total game-changer—offering a beautiful crust, a tender crumb, and an irresistible medley of seeds and oats that add texture and nutty flavor. Whether you’re a beginner baker or just pressed for time, this recipe is your new best friend in the kitchen.
Ingredients You’ll Need
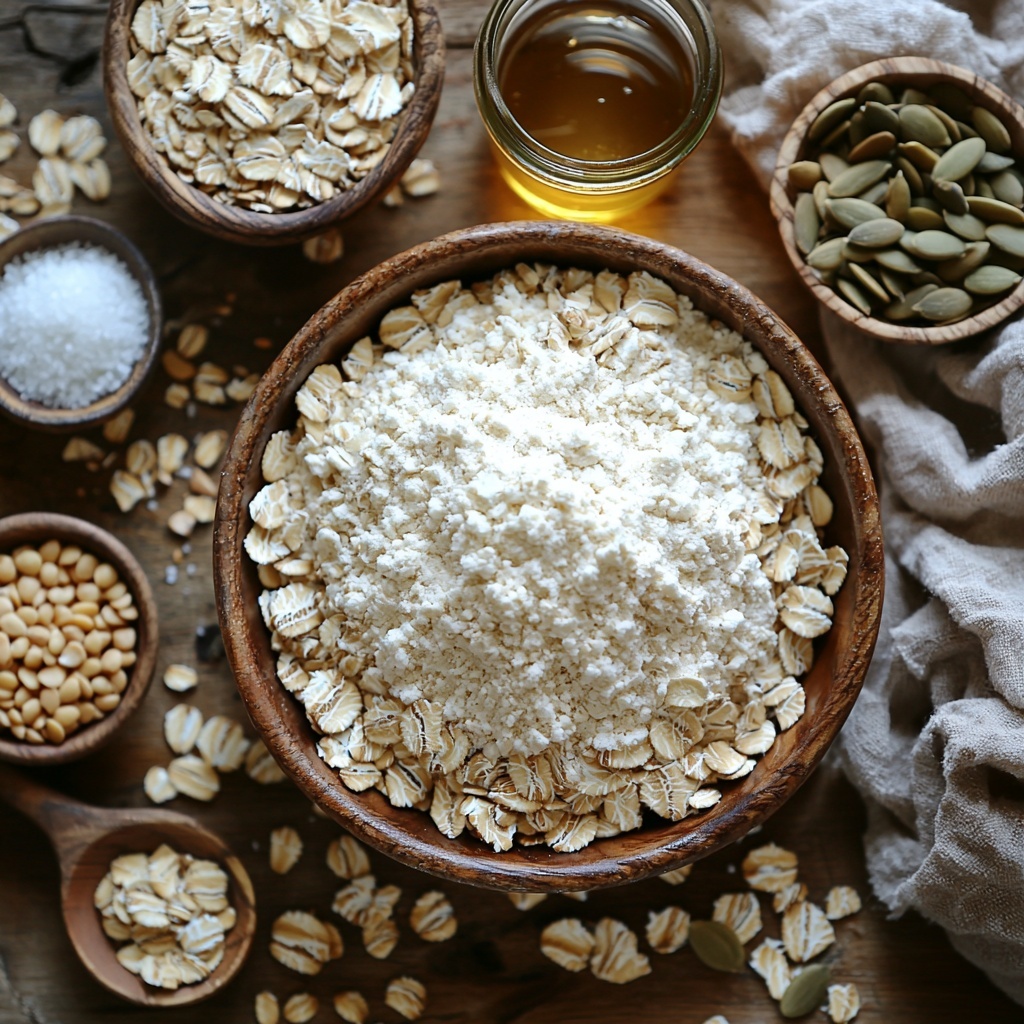
These ingredients are simple yet thoughtfully selected to bring out the best in this bread. Each component plays a crucial part: the bread flour builds structure, the seeds add crunch and nutrition, honey offers a gentle sweetness, and oats lend earthiness and texture.
- Bread flour (3 cups/390g): The backbone of the loaf, providing the perfect gluten structure for a chewy bite.
- Platinum yeast from Red Star (2 teaspoons): Instant yeast kicks in quickly without the fuss of proofing, making this recipe truly no-fuss.
- Old-fashioned whole rolled oats (1 cup + 1 tablespoon): Adds rustic texture and a comforting nuttiness throughout the bread and on top.
- Pumpkin seeds (1/4 cup + 1 tablespoon): These pepitas bring a subtle crunch and vibrant green specks that brighten the loaf.
- Sunflower seeds (1/4 cup + 1 tablespoon): Nutty and slightly sweet, these seeds pair beautifully with the pumpkin seeds.
- Flax or sesame seeds (2 tablespoons + 1 teaspoon): Tiny yet mighty, they boost nutrition and add a light, toasty note.
- Coarse salt (2 teaspoons): Essential for enhancing all flavors without overpowering the natural grain notes.
- Honey (2 tablespoons): Adds just enough gentle sweetness to balance the seeds and oats.
- Warm water (1 and 1/2 cups, about 95°F/35°C): Activates the yeast and hydrates the dough for that perfect sticky texture.
- Optional cornmeal for dusting: Creates a rustic, slightly gritty bottom crust if you choose to dust your pan.
How to Make No Knead Seeded Oat Bread Recipe
Step 1: Get Ready with a Visual Guide
Before diving in, I highly recommend watching a video demonstration if available. Seeing the dough’s texture and how it’s handled makes a big difference when you’re following this No Knead Seeded Oat Bread Recipe for the first time. It sets you up for success and builds your confidence.
Step 2: Mix Your Dry Ingredients and Add Wet
In a large, ungreased bowl, whisk together the flour and yeast to distribute everything evenly. Stir in all the oats and seeds, as well as the salt. Then mix the warm water and honey together, pouring this sweet liquid over the dry mix. Use a sturdy spatula or your hand to bring it all together—the dough will be sticky and shaggy. Don’t worry if it looks rough; that’s perfectly normal for a no-knead dough.
Step 3: First Rise on the Counter
Cover the dough tightly with plastic wrap or foil and place it on your countertop at room temperature. Let it rise for 3 hours. You’ll notice the dough nearly doubling in size, becoming dotted with air bubbles and sticking a bit to the bowl’s edges—that’s yeast at work creating awesome flavor and texture.
Step 4: Optional Refrigerated Rest for Deeper Flavor
For the best flavor and crumb, pop the dough in the refrigerator for at least 12 hours and up to 3 days. This slow fermentation allows the yeast and seeds to develop a richer, nuttier character. Even just a couple of hours chilled will enhance the bread a bit, but the longer rest really shines here.
Step 5: Shape the Dough Gently
Lightly dust a nonstick baking sheet with flour or cornmeal. Using floured hands, shape the sticky dough into a round loaf with care to keep as many bubbles as possible. You can do this right in the bowl or on a floured surface. This gentle handling ensures a lovely crumb and a beautiful rise in the oven.
Step 6: Add Your Seed Topping and Rest Again
Mix together the reserved oats and seeds, then sprinkle them generously on top of your dough ball. Press gently to make them stick. Cover loosely and let the dough rest for 45 minutes to puff up slightly and relax before baking.
Step 7: Preheat Your Oven
While your dough rests, preheat your oven to a toasty 425°F (218°C)—this high heat is what will give you that irresistible golden crust.
Step 8: Score Your Loaf
Using a sharp knife or bread lame, give your dough a few shallow slashes about half an inch deep. This scoring helps control how the bread expands while baking and adds a lovely artisanal look. If your dough has spread out too much during the rest, gently reshape it before scoring.
Step 9: Bake with Optional Steam for Crunch
Place the baking sheet in the oven’s center rack. For an extra crispy crust, place a shallow pan on the lower oven rack and carefully pour in boiling water to create steam. Quickly close the oven door to trap moisture. The steam interacts with the crust to give it that perfect crunch.
Step 10: Final Bake and Cool
Bake for 40 minutes or until the crust turns a gorgeous golden brown. If it seems to brown too fast, tent with foil to prevent burning. Tap the bottom of the loaf; if it sounds hollow, your bread is done. An instant-read thermometer inserted in the center should read 195°F (90°C). Remove and cool for at least 10–20 minutes before slicing.
How to Serve No Knead Seeded Oat Bread Recipe
Garnishes
Adding a smear of butter or creamy nut butter is an instant upgrade, but for a refreshing twist, try a light drizzle of honey and a sprinkle of flaky sea salt. Fresh herbs like rosemary or thyme tucked alongside can also elevate the presentation and flavor.
Side Dishes
This seeded oat bread pairs beautifully with everything from a simple soup—think creamy tomato or butternut squash—to robust cheeses, savory dips, and vibrant salads. Its hearty texture holds up well whether used for sandwiches or dunked into a warm stew.
Creative Ways to Present
Turn slices into toasted crostini topped with smashed avocado and chili flakes, or use them as a base for open-faced sandwiches piled high with fresh veggies and smoked salmon. For brunch, serve thick slices alongside eggs and sautéed greens for a satisfying start to the day.
Make Ahead and Storage
Storing Leftovers
Keep your leftover seeded oat bread loosely covered at room temperature for up to three days. The crust will soften a bit over time, but the interior remains lovely and moist. Avoid airtight containers which can make bread soggy.
Freezing
If you want to enjoy this bread later, slice it and freeze pieces in an airtight bag for up to a month. Frozen bread is wonderfully convenient—grab a slice or two anytime and toast straight from frozen.
Reheating
To refresh your bread, toast slices until crisp or warm a whole loaf wrapped in foil in a 350°F (175°C) oven for 10 to 15 minutes. This brings back that freshly baked aroma and crisp crust sensation.
FAQs
Can I substitute all-purpose flour for bread flour?
Yes, you can use all-purpose flour if bread flour isn’t available. The texture might be slightly less chewy, but the No Knead Seeded Oat Bread Recipe will still turn out beautifully.
Do I have to refrigerate the dough overnight?
Refrigerating the dough is optional but recommended to deepen the flavor and improve the texture. If you’re short on time, you can bake right after the initial 3-hour rise, and it will still be delicious.
What if I don’t have a Dutch oven or pizza stone?
No problem! Baking the bread on a nonstick baking sheet works perfectly well, especially if you add steam by placing a pan with boiling water in the oven as described. This simple method helps mimic the crust quality of a Dutch oven.
Can I use other seeds or nuts in this bread?
Absolutely! Feel free to experiment with chia seeds, hemp seeds, or even chopped nuts. Just keep the overall amount similar to maintain the dough’s balance and structure.
How can I tell when the bread is fully baked?
Two easy ways: tap the bottom of the cooled loaf for a hollow sound or use an instant-read thermometer to check if the center reaches 195°F (90°C). Both indicate the perfect bake.
Final Thoughts
This No Knead Seeded Oat Bread Recipe is a wonderful way to bring fresh, wholesome homemade bread to your table with minimal effort and maximum satisfaction. Once you make it, you’ll feel proud and excited to share it with family and friends. So keep your ingredients simple, your hands flour-dusted, and your heart ready to enjoy every warm, seeded slice fresh from the oven.
Print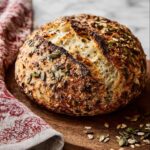
No Knead Seeded Oat Bread Recipe
- Prep Time: 4 hours
- Cook Time: 40 minutes
- Total Time: 4 hours 40 minutes (plus optional cold fermentation up to 3 days)
- Yield: 1 loaf (10-12 servings)
- Category: Bread
- Method: Baking
- Cuisine: American
- Diet: Vegetarian
Description
This No Knead Seeded Oat Bread is a wholesome and hearty loaf packed with oats, pumpkin seeds, sunflower seeds, and flax seeds. Using an easy no-knead method, it requires minimal hands-on time and yields a flavorful bread with a crisp crust and tender crumb. Perfect for sandwiches, toast, or enjoying with butter and honey, this bread also benefits from a slow refrigerator rise for enhanced flavor and texture.
Ingredients
Main Dough Ingredients
- 3 cups (390g) bread flour (spooned & leveled), plus more as needed for shaping and pan
- 2 teaspoons (about 6g) Platinum Yeast from Red Star instant yeast
- 1 cup (85g) old-fashioned whole rolled oats
- 1/4 cup (30g) unsalted pumpkin seeds (pepitas)
- 1/4 cup (30g) salted or unsalted sunflower seeds
- 2 Tablespoons (18g) flax seeds or sesame seeds
- 2 teaspoons coarse salt
- 2 Tablespoons (43g) honey
- 1 and 1/2 cups (360ml) warm water (about 95°F / 35°C)
Topping Ingredients
- 1 Tablespoon (5g) old-fashioned whole rolled oats
- 1 Tablespoon (8g) pumpkin seeds (pepitas)
- 1 Tablespoon (8g) sunflower seeds
- 1 teaspoon flax seeds or sesame seeds
Optional
- Cornmeal for dusting pan
Instructions
- Watch instructional video: Begin by watching the recommended video guide to familiarize yourself with the process and techniques for this recipe.
- Mix dry ingredients: In a large, ungreased mixing bowl, whisk together the bread flour and instant yeast. Add the oats, pumpkin seeds, sunflower seeds, flax seeds, and coarse salt, mixing to combine evenly.
- Add wet ingredients and mix dough: In a separate container, combine honey and warm water (about 95°F or 35°C). Pour this mixture over the dry ingredients. Using a silicone spatula or wooden spoon, gently stir until all flour is moistened. The dough will be sticky and shaggy; you may need to use your hands to bring it together into a rough ball inside the bowl.
- First rise at room temperature: Cover the bowl tightly with plastic wrap or aluminum foil. Let the dough rise at room temperature for 3 hours until nearly doubled in size with visible air bubbles and some dough sticking to the sides.
- Cold fermentation for flavor development (optional but recommended): For enhanced flavor and texture, refrigerate the covered dough for at least 12 hours and up to 3 days. The dough may puff up and then slightly deflate after a couple of days; this is normal.
- Prepare baking surface: Lightly dust a large nonstick baking sheet (with or without rims) with flour and/or cornmeal.
- Shape dough: Using generously floured hands and gentle pressure to avoid deflating the dough, shape the risen dough into a ball either inside the bowl or on a floured surface. The dough will remain very sticky.
- Apply seed topping and rest: Place the shaped dough ball onto the prepared baking sheet. Mix the topping ingredients together (oats, pumpkin seeds, sunflower seeds, flax seeds) and sprinkle evenly on top. Press seeds gently into the dough if they don’t stick. Loosely cover and allow the dough to rest for 45 minutes.
- Preheat oven: While the dough is resting, preheat your oven to 425°F (218°C).
- Score the dough: With a very sharp knife, bread lame, or kitchen shears, make a 1/2 inch deep slash or an X on the top of the loaf to allow expansion during baking. If the dough has flattened, gently reshape it with floured hands before scoring.
- Prepare steam pan (optional): For a crispier crust, place a shallow metal or cast iron pan on the bottom oven rack. When placing the dough in the oven, pour 3–4 cups of boiling water into this pan and quickly close the oven door to trap steam.
- Bake the bread: Place the scored dough on the center oven rack and bake for 40 minutes or until the crust turns golden brown. Tent with aluminum foil if it browns too quickly. The bread is done when it sounds hollow to a tap or an internal temperature of 195°F (90°C) is reached.
- Cool before slicing: Remove the bread from the oven and allow it to cool on a rack for at least 10–20 minutes before slicing to finish the cooking process and set the crumb.
- Storage: Store leftover bread loosely covered at room temperature for up to 3 days or refrigerate for up to 10 days to maintain freshness.
Notes
- The dough is very sticky and not suitable for mixing machines; use hands or spatula.
- Cold fermentation in the refrigerator is optional but highly recommended to develop flavor and improve texture.
- If you prefer, a pizza stone or Dutch oven can be used to bake, but this recipe bakes directly on a floured baking sheet.
- Using steam during baking improves crust crispness.
- Monitor the crust color during baking and tent with foil if needed to prevent burning.
- Use an instant-read thermometer to confirm bread’s internal temperature for perfect doneness.
- Flour amounts may vary slightly depending on humidity; add flour as needed during shaping to prevent excessive sticking.


